Our Top Five Tips for Taking Better Baby Photographs
1. Let There Be Light
Photography is all about light. Get this bit right and you are almost there. When it comes to cameras, they deal with light in a different way to our eyes. What may appear to be good light to our eyes may not be the same for your average camera and certainly will not be for a camera phone.
In your home you will have a few spots in the house which let in the most natural light. This could be by a set of patio doors or a large window. By moving your baby closer to this natural daylight, straight away the quality of the photograph will be improved. Now remember a camera deals with light in a different way to our eyes so don’t be fooled into thinking that the room is just as bright in the middle away from the windows – usually it’s not.
If the weather permits, bring your baby outside but always avoid direct sunshine. This type of light is too harsh and causes nasty shadows. We are looking for soft light so a typical Irish cloudy day outside can be ideal!
So for tip 1 – Choose a location for your baby photograph that offers lots of natural light.

2. Avoid Artificial Light and Camera Flash
As explained previously – we are looking for soft light. Standard domestic light bulbs in your home often are too harsh to be used for portrait photography and also will give your photograph an unnatural orange tint. Some cameras can compensate for this colour cast but it’s simpler just to avoid using such lighting.
On camera flash may add more light in low light conditions but the light omitted can be too too harsh for sensitive newborn eyes and is also unflattering, particularly if the camera is too close to the subject. We want to show your baby’s beautiful skin and soft daylight is by far the best option to show this.
Tip 2 - take your photograph during the day and avoid artificial lighting and on camera flash.
3. Take a number of photos, not just one!
We have all watched professional photographers at work at some time, be it a fashion photographer on the television or a wedding photographer at a wedding you are attending. Have you noticed how many photos they take? Hundreds and often thousands for a single event!
Now we are not suggesting for a second that you need to take this many photographs but you need to take a few and if possible include two set-ups or compositions. This way you will have choice. Take two or three images in quick succession for each set-up. This will maximise your chance of getting the photo just right, with no blinking or blur caused by camera shake.
Tip 3 – Take four or five photographs and include a couple of different set-ups.
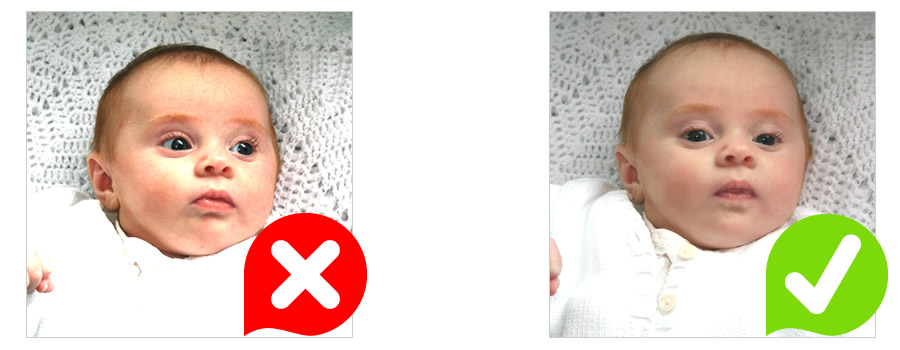
4. Get in close and think about the background!
Once you have found a good source of natural light, get in close to your baby and make sure their little face fills the view finder or screen. This helps to block out distracting backgrounds which can spoil a photograph.
You can use a number of everyday house hold items to block out the background:- large towels and blankets are ideal. Get someone to hold a blanket up behind your baby, this will make your photograph look much more professional. Tie-in your photo with a particular card design that you like by choosing a background with a similar colour scheme, this approach really works well.
So for tip 4 – fill the viewfinder or screen with your baby's face and try to neutralise cluttered backgrounds.
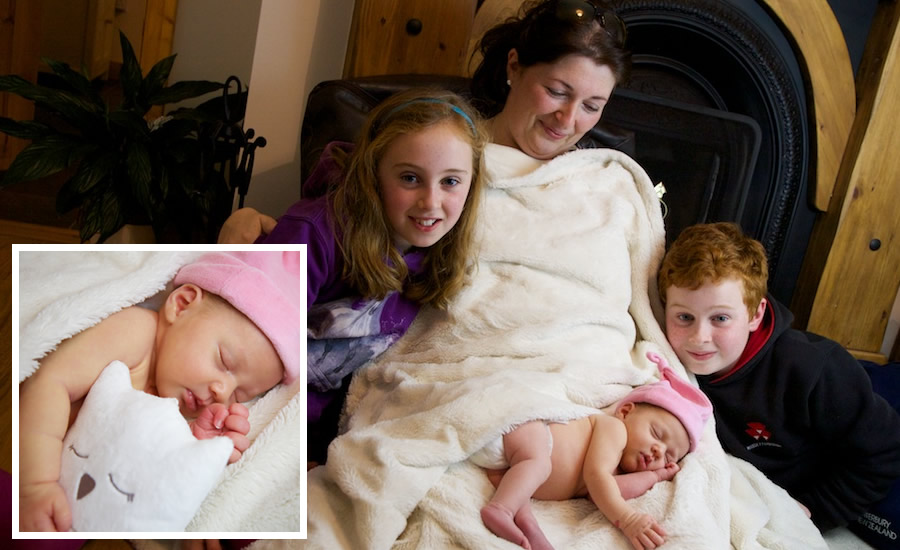
This photograph shows nicely just how simple taking a fantastic photo can be. Mum has her baby lying sleeping on her knee with a nice cream coloured fluffy baby blanket under the child. The blanket is then running up the front of Mum to neutralise the background. The photo has been taken in a well lit room with natural daylight streaming in from a large window. This lovely photo is completed by getting close to the main subject. With an added soft toy prop (also sleeping), the final photo is just soooooo cute!!! This photo took all of ten minutes to set up with no fancy camera or lights.
5. Take a photo of your baby’s little hand or foot.
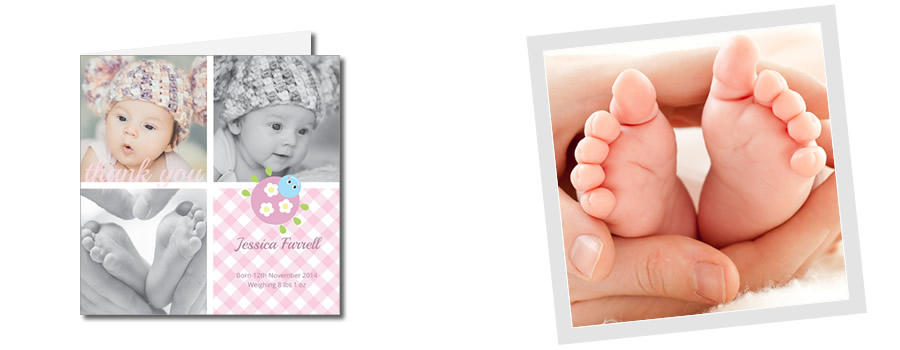
Many of our baby thank you card designs allow for the inclusion of a number of photos, up to six in fact! A photo of your baby’s hand or foot is very sweet and looks really well when shown with standard portrait shots. Our online design system allows you to convert your colour photos to black and white and this works particularly well for hand and foot shots.
So for tip 5 – take a photo of your baby's foot or hand.